
Brooder Setup
How to set up a safe, warm, and draft-free chick brooder before your hatch day arrives.
Show where the hatch goes next after the incubator.
The handoff from incubator to brooder, where newly hatched chicks need a stable first room.
Read First 24 HoursQuick Answer
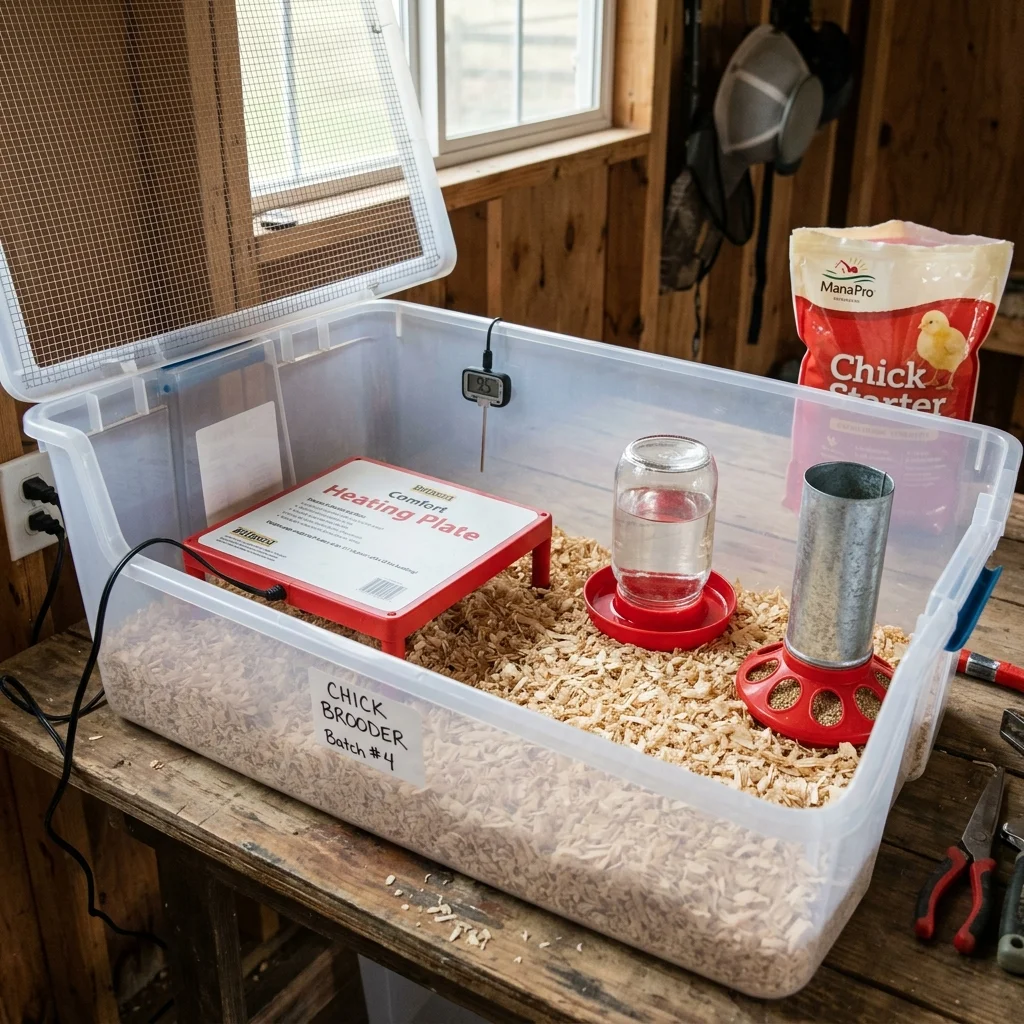
Set up and pre-heat your brooder 24 hours before hatch day. Chicks need a draft-free container with dry pine shavings bedding, an electric heating plate (preferred over fire-hazard heat lamps), and shallow water with marbles to prevent drowning. Create a temperature gradient (90–95 F under the heater, 70–75 F at the cool end) so chicks can regulate their warmth. Never use slippery newspaper or cardboard which cause permanent leg joint damage, and do not move wet chicks from the incubator.
What matters most
What this page helps you decide
This guide is for poultry keepers preparing for chick arrival. The decision is how to set up the brooder container, heat source, bedding, and feeders before hatch day. A pre-warmed brooder ensures a stress-free transition from the incubator.
- Set up the brooder during lockdown (Day 18) so it is ready and warm.
- Do not move chicks out of the incubator until they are completely dry and fluffed.
- Choose heating plates over heat lamps to eliminate fire risk and support natural sleep cycles.
The Brooder Container and Bedding
The brooder container must be secure, draft-free, and easy to clean. Large plastic storage bins, stock tanks, or heavy cardboard brooder rings work well. Line the floor with 2 inches of dry pine shavings. Never use cedar (aromatic oils are toxic) or newspaper (slippery surface causes splay leg).
- Container walls should be at least 18 inches high to prevent growing chicks from escaping.
- Use kiln-dried pine shavings or chopped straw; avoid fine sawdust which chicks might eat.
- Provide a wire mesh lid if you have indoor pets or if chicks are older than 1 week.
Heat Management: Gradient and Behavior
Chicks cannot regulate their body temperature. Provide a heating source that creates a temperature gradient: a warm zone and a cool zone. Electric heating plates mimic a mother hen, letting chicks touch the warm underside and escape to the cool air to feed.
- Adjust heating plate height so it just brushes the backs of the standing chicks.
- Target 90–95 F under the heater during week 1, reducing by 5 F each week until feathered.
- Observe behavior: Chicks piled together under heat are cold; chicks panting at the edges are hot.
Feed and Safe Water Setup
Chicks hatch with yolk reserves lasting 48 hours, but they should have access to starter feed and water immediately. Use shallow chick-safe waterers and add clean pebbles or marbles to the trough to prevent quail or small chicks from drowning or getting wet.
- Dip each chick's beak gently into the water when moving them to teach them where to drink.
- Use high-protein chick starter crumble (non-medicated or medicated depending on flock plan).
- Elevate feeders and waterers slightly on wood blocks as chicks grow to keep bedding out of them.
Reviewed against extension and veterinary sources. Adjust to your incubator manual and local conditions.