
Egg Candler Buying Guide
How to choose an egg candler based on lumens, aperture size, shell thickness, and safety.
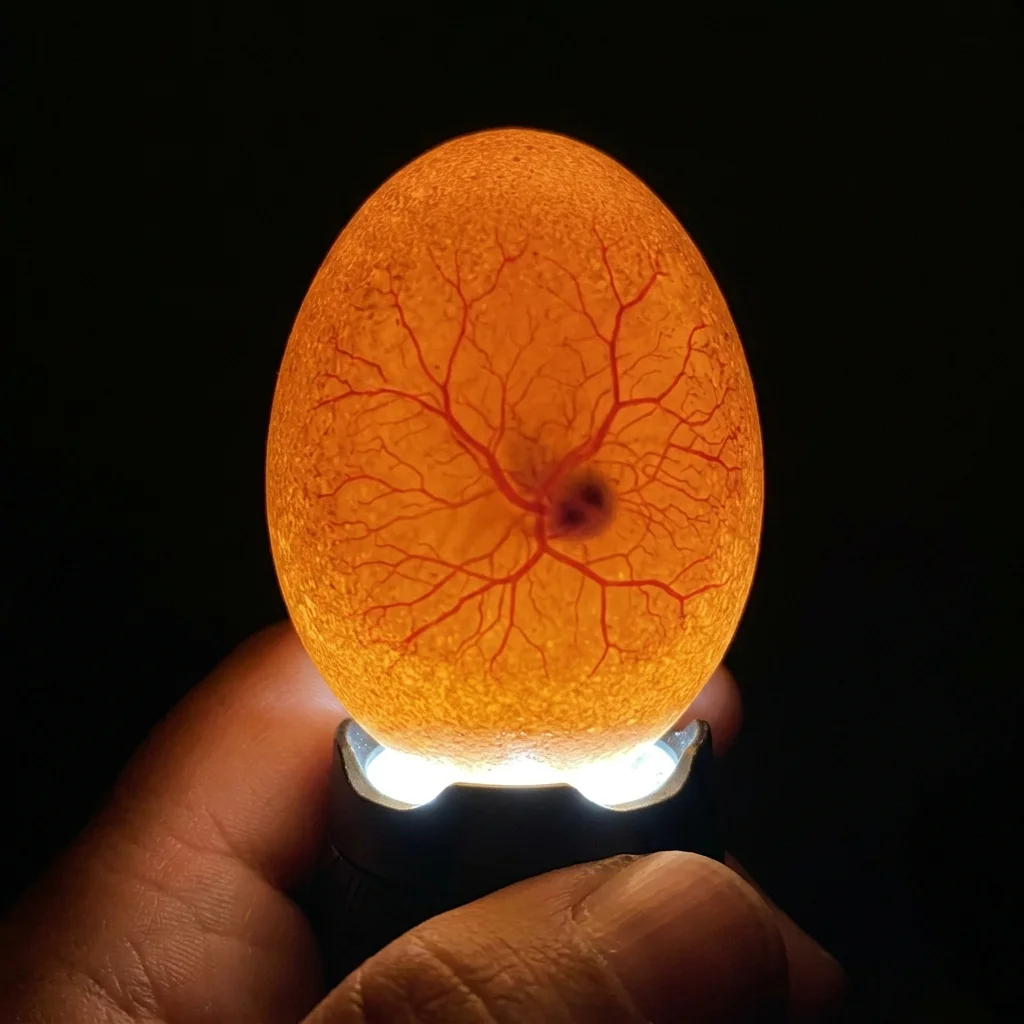
Show observation through the shell without graphic detail.
The observation-tool stage, where better light makes better decisions possible.
Read Candling GuideQuick Answer
Choose an egg candler with a high-intensity cool-white LED (at least 150 lumens for light shells, 300–500+ lumens for dark or thick shells) and a soft rubber nose cone. The rubber nose cone creates a tight seal against the egg, focusing light through the shell and preventing glare from blinding the operator. Avoid incandescent bulbs which get hot and can kill embryos during inspection. Select battery-powered models for quick mobile checks, or high-output plug-in models if you routinely candling dark brown Marans or thick green duck eggs.
What matters most
What this page helps you decide
This buying guide helps you select the best egg candling tool for your flock. The decision is matching the candler's light output and aperture shape to your egg colors and shell thicknesses. A quality candler turns guessing into clear, developmental observations.
- Choose a high-lumen LED candler if you incubate dark brown, green, or thick-shelled eggs.
- Use a pocket-sized battery unit for quick tabletop checks of white or light tinted eggs.
- Avoid using unshielded flashlights, which leak light around the shell and cause glare.
Lumens and Shell Color Matching
Shell color blocks light. While a standard smartphone flashlight can candle white chicken eggs, it cannot penetrate dark brown Marans, blue-green Olive Eggers, or thick duck shells. Select a tool with sufficient output to highlight embryonic structures clearly.
- White/Tinted eggs: 100 to 200 lumens is sufficient.
- Brown/Green eggs: 250 to 350 lumens provides clear internal contrast.
- Dark Marans/Chocolate eggs: 400+ lumens cool-white LED is required to see through dense pigment.
- Quail eggs: Needs a small aperture adapter (1/4 inch) to prevent light spill around the tiny shell.
LED Cool-Light vs Hot Bulbs
Embryos are vulnerable to heat shocks. Traditional candlers used hot incandescent bulbs which warmed up the egg during inspection. Modern candlers must use cool LEDs, which can be held against the shell for extended periods without heating the embryo.
- Verify that the candler specifies LED or 'cool light' technology.
- Keep inspection times under 30 seconds per egg to minimize thermal changes.
- Ensure the light surface does not become hot to the touch during operation.
Aperture Shape and Seal
Light must go *through* the egg, not around it. A quality candler features a flexible rubber or foam nose cone that conforms to the egg's curvature. This blocks stray light from escaping, allowing your eyes to adjust to the dim internal structures.
- Look for models that include multiple rubber ring sizes for different egg dimensions.
- The seal should be soft enough to prevent cracking thin-shelled eggs under slight pressure.
- Conduct candling in a completely dark room to maximize visibility of veins and air cells.
Reviewed against extension and veterinary sources. Adjust to your incubator manual and local conditions.