Pre-Season Incubator Check
A comprehensive pre-season checklist for testing your incubator, verifying temperature stability, and preparing backup systems before Day 1.
Show readiness, setup, and maintenance.
The equipment-readiness stage, where a quiet test run prevents urgent fixes later.
Create Hatch PlanQuick Answer
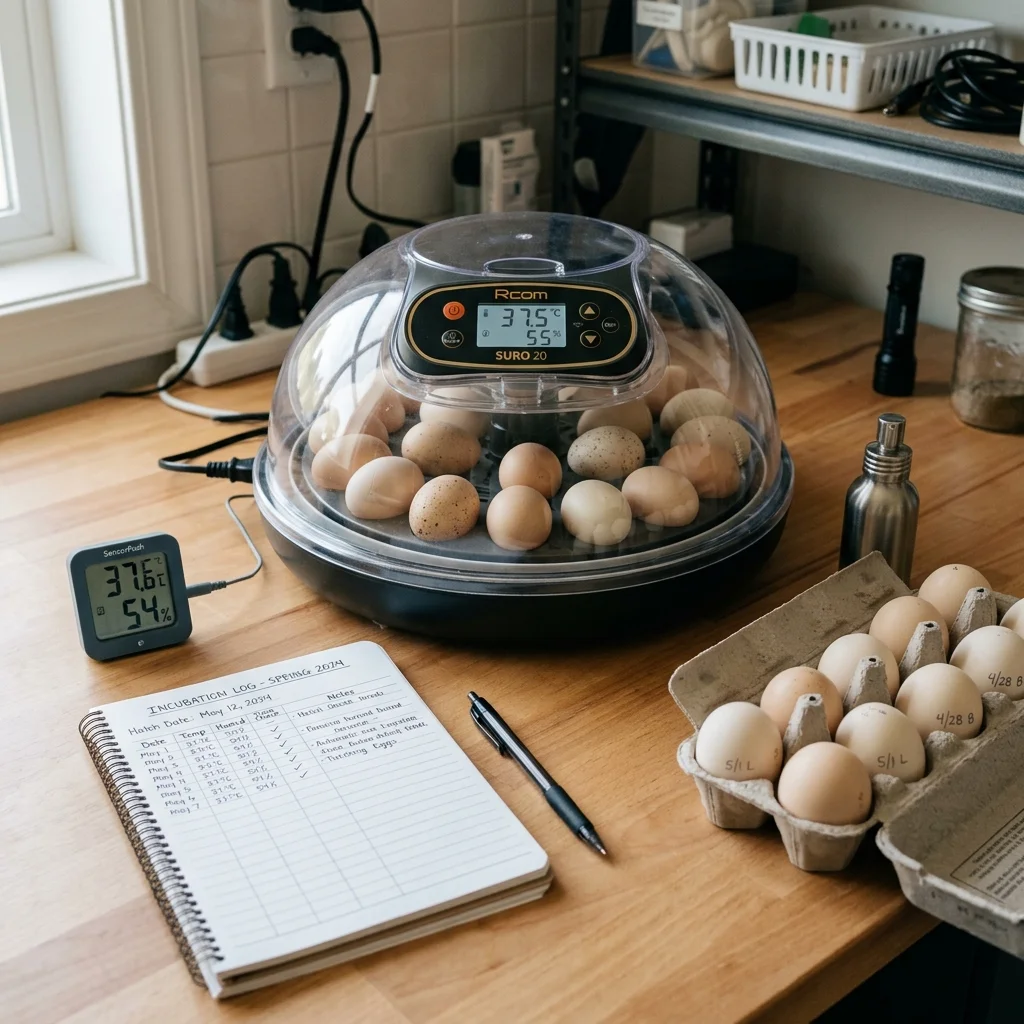
To run a pre-season check, operate the incubator empty for at least 24–48 hours in the exact room where it will stay. Verify temperature stability using a secondary calibrated thermometer, confirm the automatic egg turner tilts smoothly under load, check that the fan circulates air silently, and verify that the humidity system holds its level. Do not set eggs until you have confirmed thermal stability, calibrated your sensors, prepared a backup power option, and pre-heated your brooder heat plate. Correcting issues before Day 1 is simple, but attempting adjustments once embryos are developing risks a complete hatch failure.
What matters most
What this page helps you decide
This page guides backyard poultry keepers through a seasonal readiness check. Use this checklist when you are preparing for your first hatch of the spring, using a new incubator model, or taking a machine out of storage. The decision is straightforward: is the machine running stably enough to protect embryos, or do you need to calibrate sensors, clean parts, or replace components before setting eggs?
- Start the hatch if the empty test run holds a stable temperature and humidity baseline for 48 hours.
- Delay egg shipment/set day if the display drifts, the fan rattles, the turner slips, or the room temperature swings heavily.
- Calibrate built-in sensors against certified references rather than assuming out-of-box display accuracy.
The 48-Hour Empty Test Run
An empty test run is the single most effective way to prevent early embryonic death. Operate the machine in the actual room intended for the hatch. Garages, drafty hallways, and windowsills introduce solar gain or temperature drops that tabletop machines cannot overcome. Let the incubator reach temperature, then monitor it over a full day-night cycle to verify its heating response.
- Place the incubator on a sturdy, level surface away from direct sun, air vents, and external drafts.
- Run the machine empty for 24 to 48 hours to confirm the heating element and thermostat function properly.
- Confirm that the auto-turner motor rotates or tilts without binding or clicking under a dummy weight.
- Add water to the channels to confirm the humidity level rises and holds without leaks.
Verify Readings with a Reference
Built-in displays can become miscalibrated from age, dust, or storage dampness. Place a reliable, calibrated secondary thermometer (preferably a medical-grade digital thermometer or a liquid-in-glass thermometer) near the center of the egg tray. Take readings every few hours and compare them to the incubator's display panel.
- Set the target temperature (typically 99.5 F for forced-air or 101.5 F at the top of eggs for still-air).
- Compare built-in and secondary sensor readings after the system has stabilized for at least 4 hours.
- Note any offset (e.g., if the built-in reads 99.5 F but the reference reads 98.7 F, the built-in is reading 0.8 F too high).
- Keep secondary sensors clean and dust-free to ensure they represent real air temperature.
Check Mechanical and Electrical Parts
Before eggs arrive, run a visual and physical check of every mechanical part. A dusty fan, a dry turner motor, or a loose electrical plug can cause a sudden failure mid-hatch. Clean and tighten components now while the machine is empty.
- Fan blades: Ensure they rotate freely and quietly without vibration or dust accumulation.
- Power cords: Check for fraying, chew marks from pests in storage, or loose connections.
- Vents: Verify that air slide adjusters slide smoothly and are not blocked by debris.
- Hatching mat: Confirm the floor mesh is clean, present, and provides adequate grip for newly hatched chicks.
What to Record in Your Pre-Season Log
Establish a baseline record before setting your eggs. This log ensures you have checked all critical points and provides reference numbers if conditions drift during incubation.
- Write down the incubator manufacturer, model, and year of purchase.
- Log the test room's ambient temperature range (AM vs PM).
- Record the target temperature compared to the actual reference thermometer reading.
- Document the turner model, type (tilt vs roll), and whether the motor runs quietly.
Reviewed against extension and veterinary sources. Adjust to your incubator manual and local conditions.