
Incubator Thermometer And Hygrometer
How to select, calibrate, and position secondary temperature and humidity sensors for accurate monitoring.
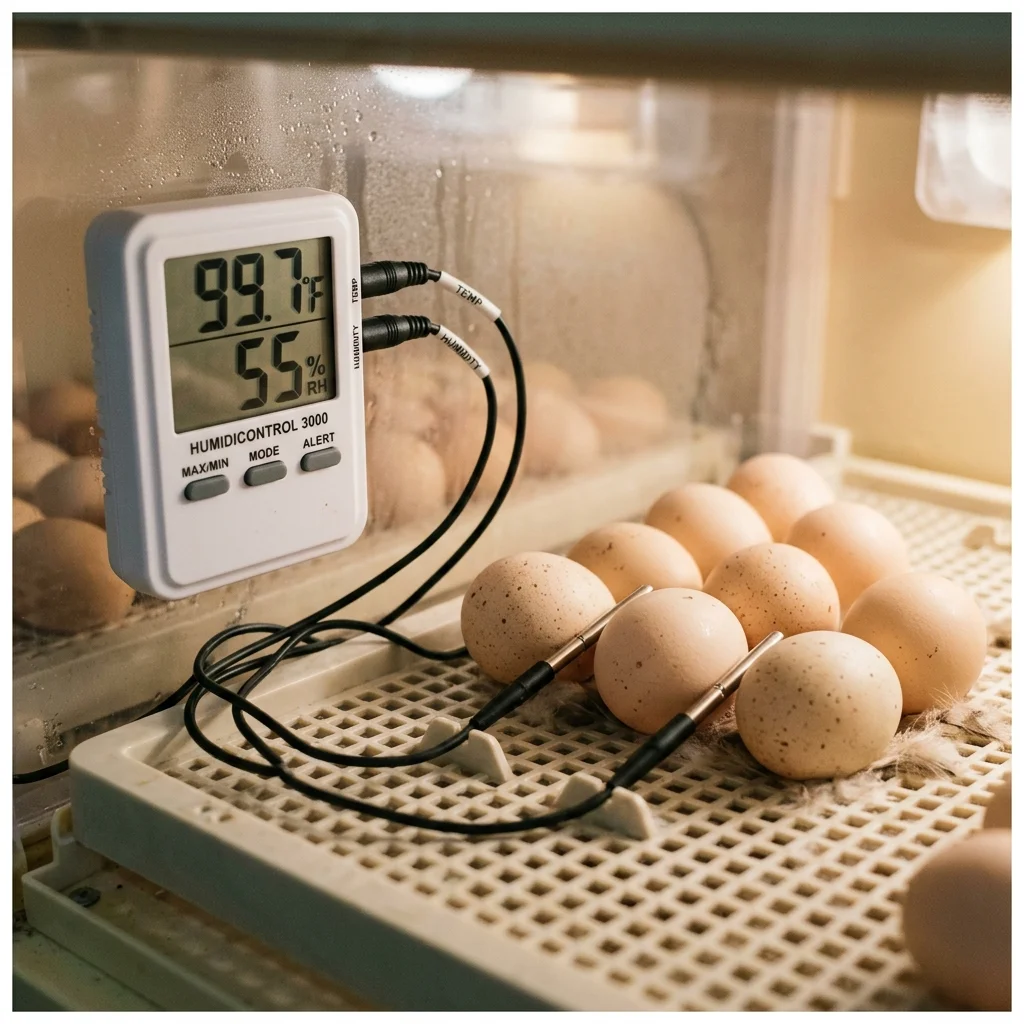
Show trusted measuring instead of guessing.
The measurement stage, where a wrong reading can cause the wrong correction.
Record ReadingsQuick Answer
To ensure accuracy, place a calibrated secondary thermometer and hygrometer inside the incubator, positioning the probe exactly at the top level of the eggs. Built-in displays often drift or show offsets, so you must verify them using a 32 F ice bath for thermometers or a 75.3% salt test for hygrometers. Focus on the temperature and humidity trends over 12–24 hours rather than reacting to short-term changes when water is added or the lid is opened. A wrong measurement can lead to incorrect thermostat changes, ruining the entire hatch.
What matters most
What this page helps you decide
This page helps you decide how to verify the environmental conditions inside your incubator. The decision is choosing secondary sensors, checking their calibration, and placing them where they represent real egg conditions. Independent verification is your main protection against display calibration errors.
- Use secondary sensors if your incubator is older, has had poor hatch rates, or has not been tested.
- Do not rely solely on the built-in display of a new machine without cross-checking.
- Calibrate sensors before setting eggs so you know the exact offset to apply.
Calibration: Ice Bath and Salt Test
Thermometers and hygrometers can be off by several degrees or percentage points straight from the factory. Perform simple calibration checks at home to identify offsets before your eggs go in.
- Ice Bath: Mix crushed ice and water in a thermos; insert thermometer probe. It should read exactly 32.0 F (0.0 C).
- Salt Test: Place a bottle cap of damp salt inside a sealed zip bag with your hygrometer. After 8 hours, it should read 75% relative humidity.
- Write down the offset (e.g., if salt test reads 71%, your sensor reads 4% too low; add 4% to daily readings).
- Recheck calibration at the start of every spring hatch season.
Proper Probe Placement
Temperature varies inside the incubator. In still-air machines, warm air rises, creating a 3–5 F difference between the top and bottom of the egg. Position probes at the top height of the eggs, avoiding contact with plastic walls, water channels, or direct heating elements.
- Position the thermometer probe tip so it rests at the same height as the upper curve of the eggs.
- Keep hygrometer probes slightly away from direct wet channels to avoid artificial 100% readings.
- Ensure probes are secured so they do not fall under the turner rails.
Reading Discipline and Logging
Do not chase small temperature fluctuations. Modern incubators cycle heaters on and off, creating minor waves. Focus on the average hourly trend. Log your readings twice daily (AM and PM) to identify draft patterns or heating drops.
- Record ambient room temperature alongside incubator readings.
- Wait 1 hour after adding water before trusting the new humidity reading.
- If a reading drifts, check sensor batteries before adjusting the thermostat.
Reviewed against extension and veterinary sources. Adjust to your incubator manual and local conditions.